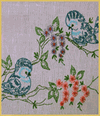
"Year of the Ox" Greeting Card
This graceful greeting card project was kindly contrubuted to us by Jacqueline Newman. Big thanks to the author!!! Jacqueline used a piece of dark pink silk, with an overlay f white crystal organza, and stitched the free "Year of the Ox". design over this. After embroidery was accomplished, Jaqueline has made it into a greetings card for her Granddaughter elect. Here's how the ready card looks, and below you'll find an
instruction, explaining the main steps:
Supplies:
- Tearaway embroidery backing
- Temporary adhesive spray
- Year of the Ox design
- Embroidery thread
- Golden effect 3-G paint tube
- Golden stickers OR stencils for the decorations (optional)
- A piece of organza, satin fabric & craft card stock, in matching colors
- White craft glue
- A pencil
Step 1. Take a piece of tearaway backing & satin fabric, and hoop them together, thoroughly.
Step 2. Apply a few "dots" of temporary adhesive spray on the satin, near the hoop edge. Stick the organza over.
Step 3. Stitch the Ox design, following thread change list. Adapt colors to your color scheme, if necessary.
Step 4. Remove hoop, and cut out the embroidery, according to the size you desire for your card.
Step 5. Take out the card stock. Position the embroidered piece over, and mark the cardstock according to it's edges, slightly, using erasible pencil.
Step 6. Apply a thin layer of white craft glue on card stock, inside the edges you've just marked.
Step 7. Carefully stick the embroider piece over the glue.
Step 8. Apply a golden frame slightly over the edge of embroidered fabric, using the decorative 3-D paint. Let the paint dry (often up to 24 hours - see manufacturer instructions).
Step 9. Add lettering and other ornaments as desired (you may do this freehand, with templates or using ecorative stickers.

 |
Supplies:
- Tearaway embroidery backing
- Temporary adhesive spray
- Year of the Ox design
- Embroidery thread
- Golden effect 3-G paint tube
- Golden stickers OR stencils for the decorations (optional)
- A piece of organza, satin fabric & craft card stock, in matching colors
- White craft glue
- A pencil
Step 1. Take a piece of tearaway backing & satin fabric, and hoop them together, thoroughly.
Step 2. Apply a few "dots" of temporary adhesive spray on the satin, near the hoop edge. Stick the organza over.
Step 3. Stitch the Ox design, following thread change list. Adapt colors to your color scheme, if necessary.
Step 4. Remove hoop, and cut out the embroidery, according to the size you desire for your card.
Step 5. Take out the card stock. Position the embroidered piece over, and mark the cardstock according to it's edges, slightly, using erasible pencil.
Step 6. Apply a thin layer of white craft glue on card stock, inside the edges you've just marked.
Step 7. Carefully stick the embroider piece over the glue.
Step 8. Apply a golden frame slightly over the edge of embroidered fabric, using the decorative 3-D paint. Let the paint dry (often up to 24 hours - see manufacturer instructions).
Step 9. Add lettering and other ornaments as desired (you may do this freehand, with templates or using ecorative stickers.


