Self - Adhesive Embroidered Lamp Shade

There is an incredibly easy and cheap way to make lamps in custom colors and styles, that hardly anyone knows about.
To design your own, unique lamp, all you may need to do is buy a self adhesive lamp shade, for around $5, and decorate it in your style, matching to the place where it will stand.
The possibilities are endless.
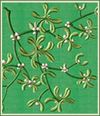
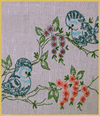
For example, Jenni Isfan bought a round lamp shade from Wisconsin Lighting. Then she embroidered our Art Nouveau machine embroidery trees on a nice piece of fabric, attached this fabric to self adhesive shade base, and added 3D Art Nouveau butterflies from the same designs set, for beauty.
And voila - original lamp shade ready in no time!
Supplies:
- Art Nouveau Garden cross stitch package
- Polyester Embroidery thread
- Water-soluble topping
- Tear away stabilizer
- Erasable fabric marker
- 1 yard of neutral fabric for background
- 1 self-adhesive lampshade
- Coordinating beaded trim
- � yard white tulle fabric
Step 1
Using the paper cover for the lampshade, cut around as a pattern, leaving an approx 1-inch allowance for folding over.

Step 2
Fold the pattern in half, and then each half in half again � creating 1/3 marks � mark the fabric at the folds and draw a line showing the 1/3 marks. Take the bottom and top of each line, line up again, and mark the center of each line � this cross will be the center of each of your base embroidery patterns.

Step 3
Embroider your 3 favorite trees from the Art Nouveau Garden Collection � centered on each of the lines.

Step 4
Place fabric on the lampshade as per directions
Step 5
Embroider 2 dragonflies and 1 butterfly from the Art Nouveau Garden Collection at 90% of the full size. Embroider on 2 pieces of tulle that have been supported by 2 layers of tear-away stabilizer and has been covered with one piece of water-soluble stabilizer. After embroidery is completed, rip away stabilizer and cut tulle to just outside of the embroidery.

Step 6
Glue-gun the butterfly and the dragonflies to the trees where it would be most attractive. Glue only the bodies, leaving the wings free to create the 3-d look.

Step 7
Finish by glue gunning the beaded trim to wrong side of the lampshade. Enjoy!

To design your own, unique lamp, all you may need to do is buy a self adhesive lamp shade, for around $5, and decorate it in your style, matching to the place where it will stand.
The possibilities are endless.
For example, Jenni Isfan bought a round lamp shade from Wisconsin Lighting. Then she embroidered our Art Nouveau machine embroidery trees on a nice piece of fabric, attached this fabric to self adhesive shade base, and added 3D Art Nouveau butterflies from the same designs set, for beauty.
And voila - original lamp shade ready in no time!
Supplies:
- Art Nouveau Garden cross stitch package
- Polyester Embroidery thread
- Water-soluble topping
- Tear away stabilizer
- Erasable fabric marker
- 1 yard of neutral fabric for background
- 1 self-adhesive lampshade
- Coordinating beaded trim
- � yard white tulle fabric
Step 1
Using the paper cover for the lampshade, cut around as a pattern, leaving an approx 1-inch allowance for folding over.

Step 2
Fold the pattern in half, and then each half in half again � creating 1/3 marks � mark the fabric at the folds and draw a line showing the 1/3 marks. Take the bottom and top of each line, line up again, and mark the center of each line � this cross will be the center of each of your base embroidery patterns.

Step 3
Embroider your 3 favorite trees from the Art Nouveau Garden Collection � centered on each of the lines.

Step 4
Place fabric on the lampshade as per directions
Step 5
Embroider 2 dragonflies and 1 butterfly from the Art Nouveau Garden Collection at 90% of the full size. Embroider on 2 pieces of tulle that have been supported by 2 layers of tear-away stabilizer and has been covered with one piece of water-soluble stabilizer. After embroidery is completed, rip away stabilizer and cut tulle to just outside of the embroidery.

Step 6
Glue-gun the butterfly and the dragonflies to the trees where it would be most attractive. Glue only the bodies, leaving the wings free to create the 3-d look.

Step 7
Finish by glue gunning the beaded trim to wrong side of the lampshade. Enjoy!


