
Fonts Combo CDs

Fast Gifts Ideas

Polyester Thread

Embroidery Needles

Supplies Combo Packs
Patch-Making Technique on Embroidery Machine - Page 2
Detailed Directions
1.Hoop water-soluble backing (alone), and slide the hoop into embroidery machine. The backing mustn't pucker. If it puckers rehoop it again, until you achieve the desired result.
Large hoops sometimes don't hold fabric/stabilizer well enough. If your hoop has such tendency, insert a piece of thick fabric between four opposite hoop sides, when hoping your stabilizer.
Or, purchase a new hoop. Most machine manufacturers have recently noticed this problem, and started offering hoops with special metal spins. These little spins do wonders, and hold the fabric/stabilizer in place. So ask your dealer for such hoop. You will be glad you did.

2. Mark future patch contours, using embroidery machine and the very first thread of selected patch design.
Just load a patch-type design, and embroider the first thread. You may use any color, it really doesn't matter because it'll be hidden. This outline is embroidered to mark the exact place where adhesive spray should be applied, and where the patch base fabric should be positioned later. Finished result of this step should look something like this:

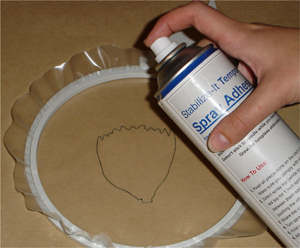
3. Apply temporary spray adhesive on soluble backing, inside the embroidered outline.
Be careful, and read directions on spray before doing anything. Stabilize-It temporary adhesive spray and water soluble backing work great together, and the spray works in such way that you can apply it on very small, precise area. Yet, if you are using different product (brand) for this purpose, be sure to check how it works on a small test-piece of soluble backing, first. To avoid unpleasant surprises. Here's a photo in process of applying temporary spray adhesive to our patch project:
4. Position a piece of lightweight base fabric over the hooped WSB.
Just stick it over the outlined area. Temporary spray adhesive that you've just applied will hold the fabric in place, and prevent it from puckering later on. Let the adhesive spray dry (2-3 minutes is enough).

Sew the fabric to water-soluble backing. Just embroider the second thread of patch design. The result should look like this:

Remove the hoop.
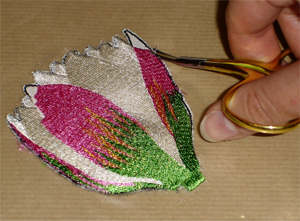
Do NOT unhoop the stabilizer. Cut excess fabric edges, using very sharp appliqu� scissors.Cut as close to seam edge as you can. See photo:
5. Slide in the hoop back into your machine, and embroider the rest of design, following thread change list.

When you embroider everything but the outlines, remove the hoop again, and carefully cut all pulling threads and thread "tails", if there are.
Then, finish the design.

When the design is completed, cut away large pieces of water-soluble backing, and wash away the rest. Some water-soluble stabilizers require sinking. Be sure to wash the backing off well. Here are the photo of final result:
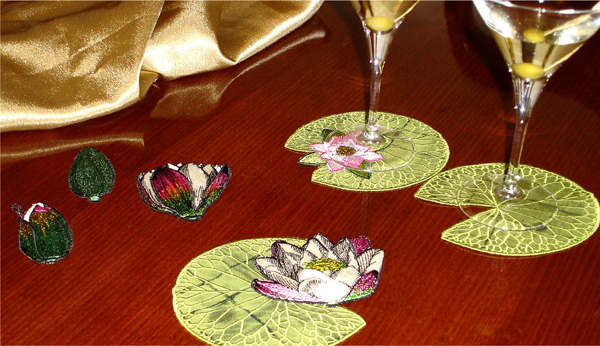
If you'd like to get Water Lilies designs - please visit these link: Water Lilies Set
 10 Water Lilies patch-type designs for 4x4 & 5x7-inch hoops. Regular price: $27.00 Sale price: $13.50 |  11 stunning Halloween patch-type designs.
4x4 inch hoop. Instruction included. Regular price: $29.90 Sale price: $14.95 |